2.23.2013

.diy chevron washi tape letter.

I had an unfinished wooden B.

I had a roll of red and white chevron duct tape from the dollar bin at target.

I had an idea: combine the two!

Let the pictures do the talkin' and you can make one too!


// TIPS //

+ An X-ACTO knife comes in handy if you're covering a letter with curves, to make little slits on the back side of the tape and wrap it around the curve.

+  To wrap the edges more cleanly, I suggest leaving more overhang than I did on mine. I had to go back over my edges with more tape to cover some exposed wood. I'll probably have to mod-podge over the edges because the tape is wanting to peel up.

+ Be sure to line up the pattern on your tape (even if that means overlapping your pieces a little bit) to create a more seamless look.

Now, it's your turn!

2.14.2013

.DIY chair and v-day.


Today is Valentine's Day!

Hubs and I kept our celebration low-key this year. When he got home from work, we put on comfy clothes and cooked breakfast for dinner together. On the menu was fried eggs, bacon, biscuits and orange juice.

After brinner, we got our love note jars off the mantel and took turns reading out loud the reasons we love each other.

I want to make note of the things Hubs said he loves about me {his words, not mine}:

+ my kind spirit
+ my beautiful eyes
+ my faith
+ the way I make him laugh and make him feel special

Nothing feels better than knowing the man I love and admire so much thinks so highly of me!

After reading each others' love notes, we opened our gifts. I got Hubs a dri-fit Razorbacks pullover jacket, and he got me a gift card to Hancock Fabrics.


I also want to share a quick DIY project I accomplished today when I got home from work.

All I did was recover the seat of a vintage chair that sits in our living room. A simple, no-sew update that I think makes a world of difference!


I used hot glue to secure the fabric around the seat and added a throw pillow I picked up recently from T.J. Maxx. I'm very happy with this old chair's new modern look!

Here's hoping you had a blessed Valentine's Day!
xoxo

2.04.2013

.currently.


Currently, I am...

LOVING:
My days off from work. I have been more intentional lately with how I spend my time and am doing a better job cleaning and/or organizing at least one area of the house before beginning whatever thrifting or DIY adventure sounds fun for the day.

READING:
What On Earth Am I Here For? by Rick Warren. It's the updated version of The Purpose-Driven Life, and we are reading it for our church small group. Our study literally just started, so I just read chapter one.

WATCHING:
My DVR records my favorite shows for me. Those include The Bachelor, Teen Mom 2, The Real Housewives of Beverly Hills and Nashville. Total guilty pleasures and mind-numbing entertainment after a long day at work.

ANTICIPATING:
Pregnancy. Wondering when my time will come.

LISTENING TO:
Taylor Swift's RED cd on replay over and over again in my car. My Pandora stations vary between Phillip Phillips, Casting Crowns and Kelly Clarkson.

PLANNING:
Art projects for my kids at school to display at our upcoming Art Show in April.

WORKING ON:
Sewing and creating inventory for an upcoming project that begins this Summer. Details to be revealed in the future, but I promise it's exciting. I'm stock-piling as much as I can while the creative bug is biting!

WISHING:
For snow.


I got the idea for this post from POCKETFUL OF PRETTY.

I'd love to know what you're currently up to!

2.03.2013

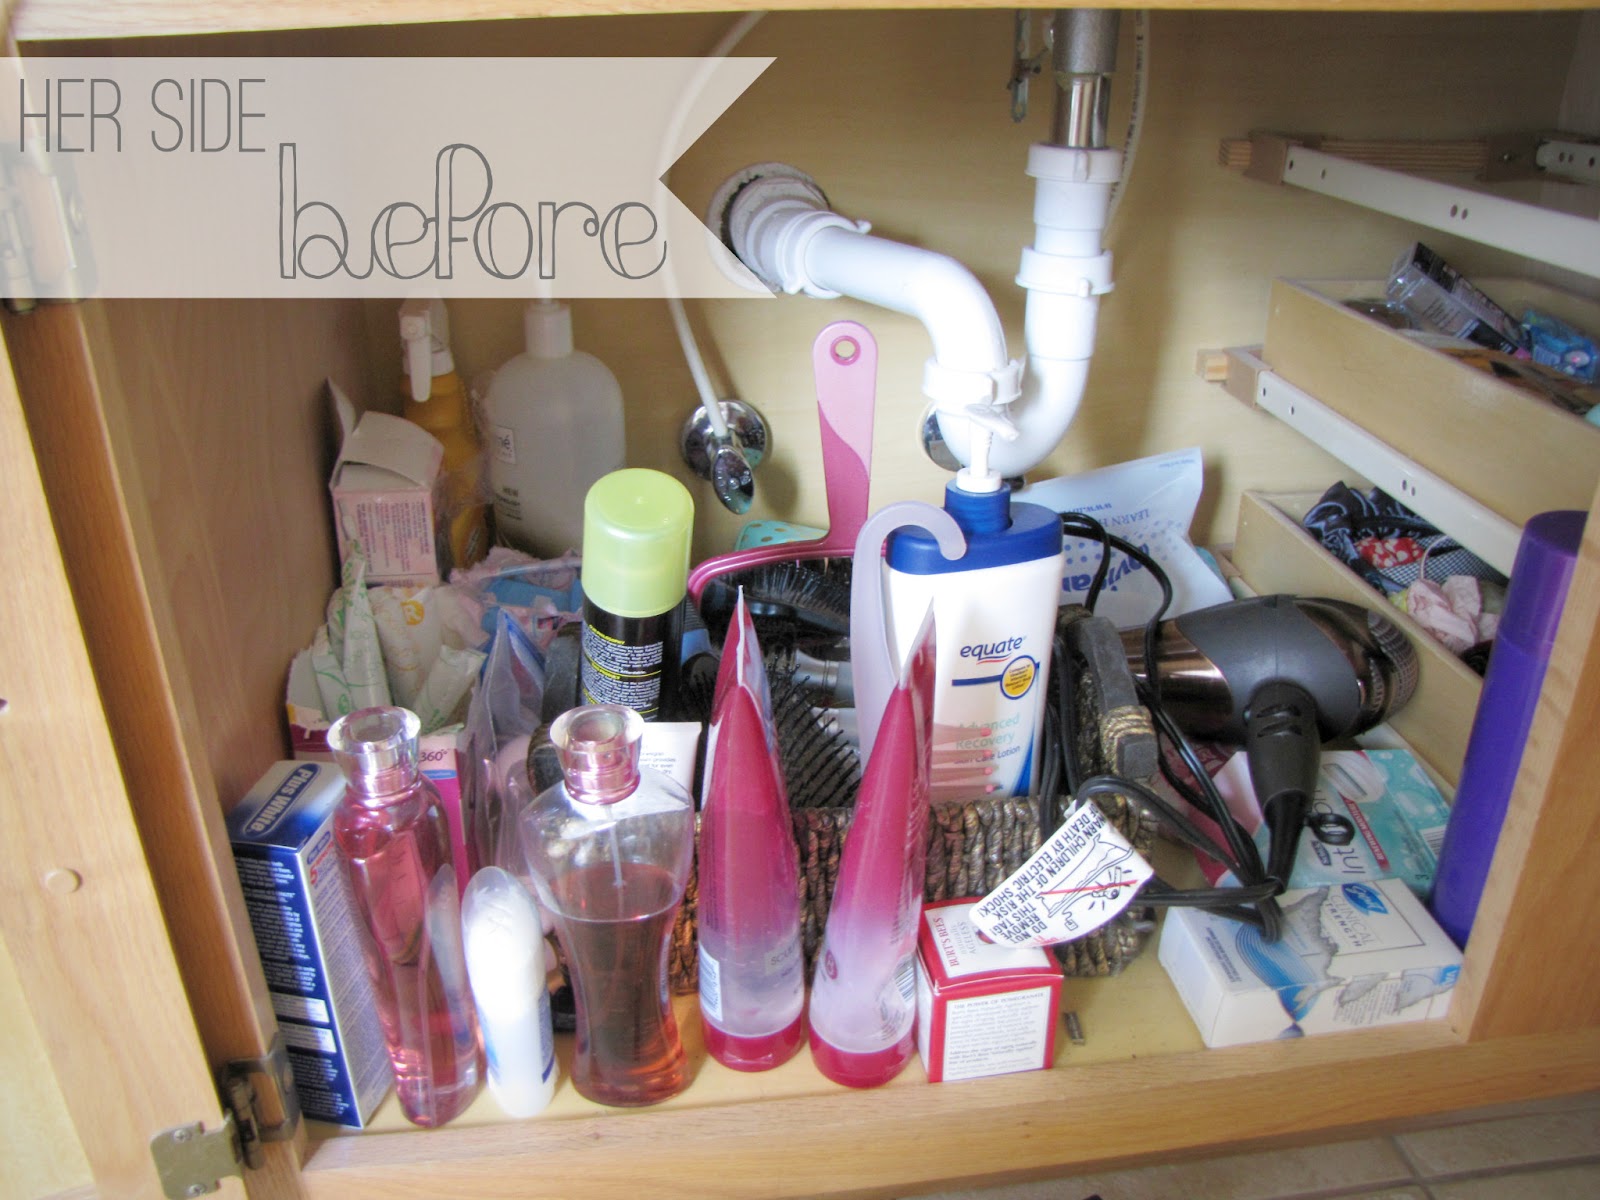
.bathroom organization.

I don't know if you remember or not, but one of my new year's goals was to make my house more of a home. Basically, step one is to get more organized.

Today I can say, I've conquered the storage area under our bathroom sinks.

First, I've got to give credit where credit is due. My inspiration for this project came after reading this blog post:


Combine that inspiration with the blog post:


And I knew exactly what I needed to do. But first, the before pictures:


Complete unorganized mess. You couldn't get one thing out without knocking something else over. It was long overdue for a change.


My cheap supplies:

+ Mainstays 3 Stacking Bins from Walmart // $4.97
+ Four baskets from the Dollar Tree // $4

For a total cost of $8.97.

Literally no more than 15 minutes later, I had this:


Everything is organized and easy to get to. Except my hair dryer. That things kills me. It's so big and bulky. I wish I had a better way to store it, but maybe if I move some stuff around I can figure it out.

All in all, I'm pretty happy with my newly organized bathroom cabinets. This was a very cheap, time efficient project. Hopefully what I've done will inspire you to tackle a small unorganized area of your home!

1.28.2013

.the vine app.

So I have new social media obsession, and it's not Twitter, Facebook, Instagram or Pinterest.

It's called Vine.


It's a new app (currently only available on the iPhone) that allows you to film 6-second videos then share them with your followers.

Just another addiction to add to the list!

Here's one of my uploads:


Follow me on Vine at martylou83.

1.25.2013

.craft party.


Last night was SO. MUCH. FUN.

A group of girlfriends (there were 8 of us) got together and ate, made crafts and laughed.

My lovely friend Leslie hosted at her house, and she did a phenomenal job.

.the fabulous hostess.
...

I knew upon walking up to Leslie's house that this party was going to be epic. I mean, check out her front porch decor. So cute, right?!

...

Each one of us brought an appetizer, but Leslie provided everything else. And when I say everything, I mean she really thought of everything! 

.the yummy food bar.
...

.Leslie's hand-written chalk sign. Who does this stuff?? She's my new role model. 
...

Leslie provided a plethora of scrapbook paper, paint, ribbon, embellishments, etc.  There was such a variety, we were all able to find something we each liked for our magnetic boards, which was our first craft.


...

 The magnetic boards were so much fun to make! Leslie bought unfinished wood frames from Hobby Lobby and inserted aluminum sheets she found in the plumbing department in Lowe's. She actually had to hand cut each sheet to fit inside the frames.

We painted the edges of our frames then mod podged on our paper of choice, followed by as many embellishments as we pleased. You better believe our amazing hostess had a station for the hot glue gun as well as a variety of paints to choose from!

...

I love how each of our personalities were reflected in our finished products.


...

Our next craft was to make scented sugar scrub.

We were supplied with cute little jars, brown sugar, oil, and a variety of perfume samples to fragrance our creations with.

...

After we got our scrub all mixed together and put in the jar, we chose a ribbon or twine to wrap around the jar with a cute little tag and wooden spoon.

 ...

Everyone picked a different scent for their scrub. I chose Philosophy Amazing Grace for mine and I'm crazy about how it smells!

At the end of the night, Leslie gave us each a cute little tote to put our crafty creations in and take home.

...

Every little detail of this party was literally so thought out and perfect. I can't imagine how it possibly could've been any better.

It was one of the best nights I've ever had with friends and I can't wait to do it again!

1.21.2013

.recent DIY projects.

I want to share a few of the DIY projects I've completed the past couple of weeks.

//1//
Rustic Glam Cake Stand


Supplies:

+ stump plaque from Hobby Lobby
+ thrifted candlestick
+ super glue


//2//
Southern Tee


Supplies:

+ thrifted tee
+ gold fabric paint
+ foam brush
+ freezer paper for stencil
+ silhouette cameo or X-acto knife to cut stencil out of freezer paper
+ iron


//3//
Arrow Duvet Cover


Supplies:

+ solid duvet cover
+ acrylic paint marker


What have you made lately?